

Coronet, step 2
By JC | September 3, 2014
Okay, this was the fun part: color-coding the in-the-round stitch maps for Coronet, using one color for the repeated stitches and another for the “extra” stitches needed to balance the pattern when working it flat.
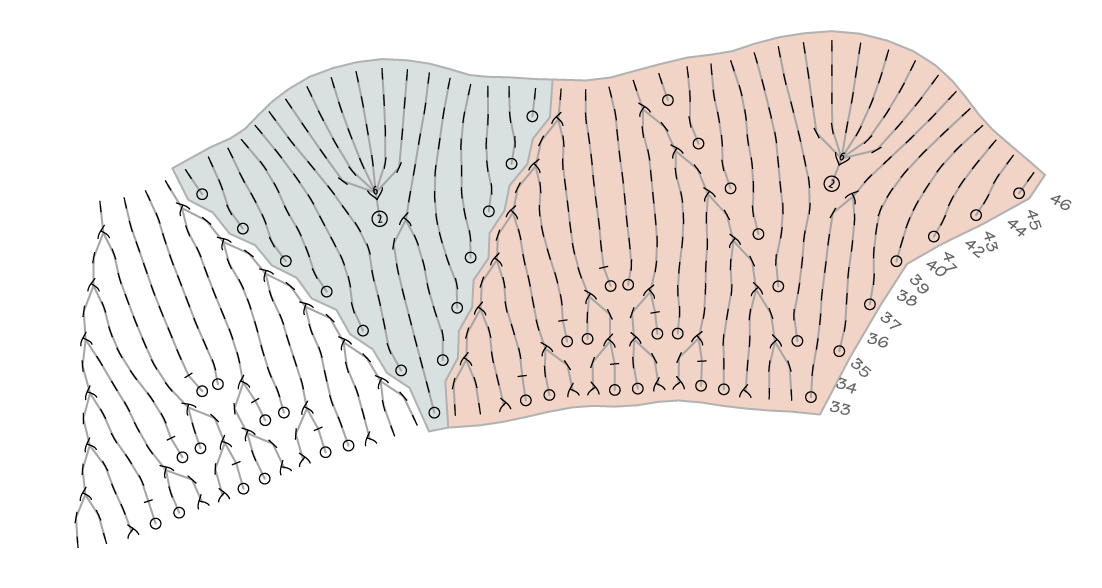
I went the high-tech route, exporting the stitch maps as PDFs and tweaking them in Illustrator. But low-tech routes are possible too: saving a stitch map as a PNG and annotating it in any drawing program, or even printing a stitch map and having at it with colored pencils.
Was this color-coding really necessary? I suppose not, but it helped with the next step of the process. And, like I said, it was fun.
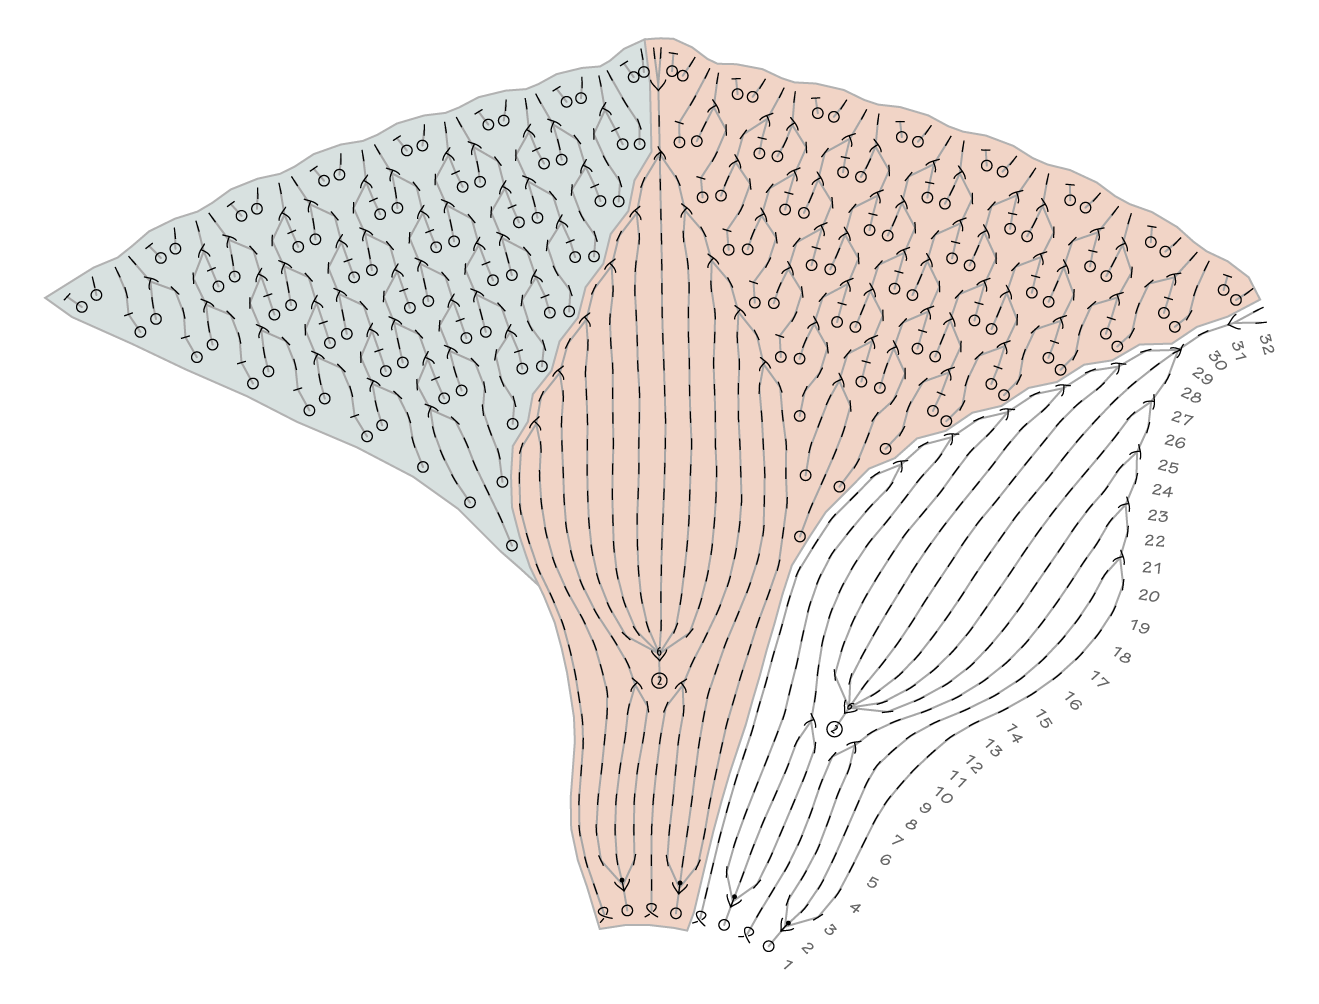
Next up was creating a new stitch map for use flat, as a wedge. Using the color coding as a guide, and entering each row in the form of “*repeated stitches, rep from *, extra stitches,” I did fine through row 32.
At row 33, I ran into a hiccup. To get all the stitches to line up nicely, it had to start one stitch further to the right. Fine, fine, so I added selvedge stitches to the wedge, then continued entering the remaining rows.

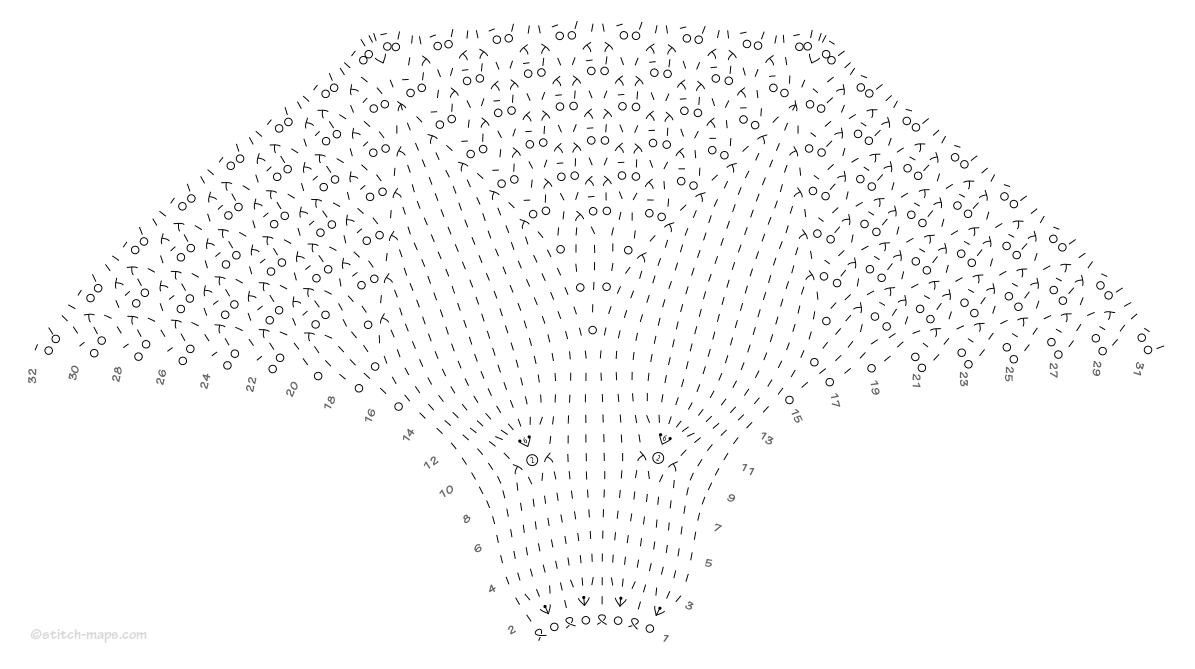
And ta da! Okay, so the final stitch map is shaped kind of funny. It looks too narrow in the first few rows. Would the extra-large eyelets created on rows 10 and 11 “balloon out” and let the final fabric take a proper wedge shape? Or would the initial rows need to be modified? Swatching would give the answer, of course.
2 Comments