It may look like I’m cheating on my shawl project, but I’m not. Not really, anyway.
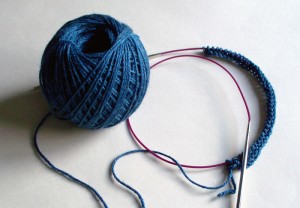
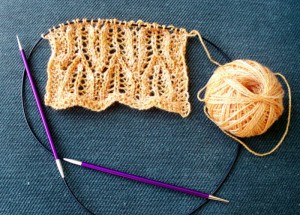
Say hello to Mirasol Nuna, a yummy blend of wool, silk, and bamboo. The desire/need to knit another Swirl hit me while at Stitches East, so I purchased a skein of Nuna and a couple skeins of other yarns to audition for Going Green. And I have a mighty strong urge to be swatching all of them.
But how to ensure that Progress Happens on the shawl, even while being tempted by Swirl startitis? As an experiment, I’m testing out a two-tier version of tried-and-true MDKR (Minimum Daily Knitting Requirement) program.
Being a process knitter with limited attention span, I find it easier to complete large projects – like a shawl – if I set for myself a MDKR. For the shawl, it’s currently 2 rows per day… a paltry amount, really, but enough to ensure that Progress Happens, for two reasons:
- It gets me started. If I pick up the shawl and knit 2 rows, I’m likely to keep going and knit a few more.
- If I don’t complete today’s MDKR today, I have to make up for it tomorrow… in addition to tomorrow’s own MDKR.
That’s the usual single-tier MDKR system. Here’s where the second tier comes in: each day, I’m going to see if I can avoid swatching for my next Swirl until after I’ve completed 8 rows on the shawl. Two rows remains the daily minimum (to be completed the next day, if need be), but 8 rows says “enough with the shawl; let’s swatch!”
Will it work? It’ll certainly move the shawl along. But will progress on the swatches be agonizingly slow? I’ll keep you posted.
Check out this article: “I Suck at Photoshop.” The subtitle is telling: “Except I Don’t, and You Don’t Suck at That Thing You’re ‘Bad at’ Either.” The whole idea is that no-one is really good at anything when they first try; it always takes some effort and practice.
Ya gotta love the article’s tone. Here’s my favorite quote: “…what could be easier than improving at something you suck at? The bar is so low. […] Frankly, you should revel in the things you suck at. What a fantastic opportunity to grow with hardly any effort!”
Too true in knitting. No-one pulls off a smooth, fluid crochet-onto-the-needle cast-on on their first go. Reading your knitting and reading charts gets easier with practice. And I’m still waiting for the day that stranded colorwork feels effortless.
What could you suck at less, if you spent some time at it? Me, I’m going to try to suck less at blogging, as part of NaBloPoMo. We’ll see what happens.
Remember that Haapsalu shawl I wrote about in my last post? I decided to place a narrow border around the whole thing. Traditionally, that’d mean knitting the body of the shawl, then separately knitting the edging from the outside in and sewing it in place. I may decide instead to pick up edging stitches from the body and knit the edging from the inside out… but either way, I have to complete the body first.
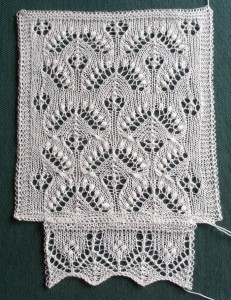
It’s going to take some time. I’ve set a Minimum Daily Knitting Requirement of two rows, and though I manage to squeeze in six or more rows on most days, so far it still looks kind of puny:
I’ve nearly completed 6 repeats of the 28-row pattern, but I figure I’ll need 20+ repeats to get a shawl of reasonable length. Hmm. Let’s not estimate how long that’ll take, shall we?
In other news, I’m excited to report I’m scheduled to teach at next year’s DFW Fiber Fest. From all I’ve heard, it ought to be a good time. (If I weren’t going to be busy teaching the whole time, I’d be tempted to take Darla Fanton’s Tunisian crochet classes. Aren’t the Tunisian Aran samples intriguing?)
Online registration opened today – but note that the materials lists for Bind-off Bonanza and Charts Made Simple are a little out of kilter. The folks at DFW Fiber Fest assure me they’ll update their website ASAP. In the meantime, you can view the correct materials lists here and here. While you’re at it, check out the expanded version of the Slick Set-in Sleeves homework, complete with schematics that help you make sense of what’s going on.
Let’s take bets: will I have the Haapsalu shawl done and ready to wear at the DFW Fiber Fest next March?
Lately I’ve been enthralled by Estonian lace. I’m not sure what got me off on this kick, but I do know what’s fueled it along:
- Taking in the Knitted Lace of Estonia exhibit at Lacis – not in person, unfortunately, but virtually through its stunning slideshow. Don’t you just love how the photos show a clear contrast in tone between the plain knit sections, the sections with yarn overs, and the sections with nupps?
- Reading Knitted Lace of Estonia by Nancy Bush and The Haapsalu Shawl by Siiri Reimann and Aime Edasi. Fabulous books, the both of ’em.
- Placing the winning Silent Auction bid on a skein of laceweight Grignasco Prezioso at a local retreat.
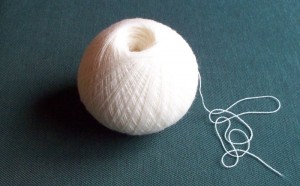
Winning that skein of laceweight sealed my fate: since then, I’ve been swatching Estonian patterns, bound and determined to find a main stitch pattern and an edging that, together, will be worthy of the yarn.
You see, it’s not just that the yarn is scrumptious. (And at 85% extrafine merino and 15% cashmere, it is scrumptious. “Buttery” and “ethereal” also come to mind.) It’s not just that the yarn is discontinued. It’s not just that I got it for a steal – only $12.50 for 1500+ yards! No, I need to knit something spectacular out of the yarn for a very simple reason: I owe it to some special friends.
Picture this: You’re at a Silent Auction, scoping out the yarn and books and whatnot that other retreat members are destashing. You spy three skeins of laceweight. You’re smart enough to read the fine print on one that says “15% cashmere,” and lucky enough to place the winning bid. Thrilled beyond compare, you borrow a swift and ball winder… and discover the skein is tangled. Not horribly; not so you’d notice at first glance. But bad enough that you can’t just crank away at the ball winder. Instead, you have to HAND WIND, passing the nascent ball under a strand or two of yarn with each revolution of the swift.
Yesiree, I spent hours hand winding those 1500+ yards, with the help of friends that took pity on me. They gave up their own valuable knitting time to spin the swift so I could wind more freely. And when the yarn became even more discombobulated and the swift had to remain stationary, they stood on chairs and pulled the yarn off the top of the swift for me. Their help made the hand-winding possible; their support kept me sane. So it’s with a great debt of gratitude to Penny, Evelyn, Grace, Jeannette, and Marvina that something awesome has to come of that blasted skein of yarn.
But enough of the yarn’s story. Let’s get to the swatch photos!
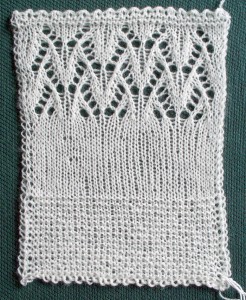
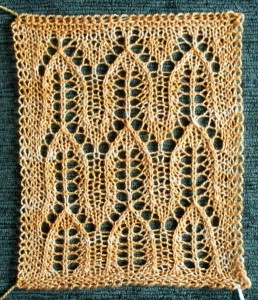
I started out by knitting three nearly identical swatches, each with sections of garter, stockinette, and an Estonian pattern called Half Leaf. The first swatch was on 3.5 mm needles, and was a bit too loose. The second was on 3 mm needles, and was a bit too firm. The third, knit on size 3.25 mm needles, hit the Goldilocks sweet spot:
Isn’t Half Leaf pattern lovely? I need to design a scarf or something out of that someday.
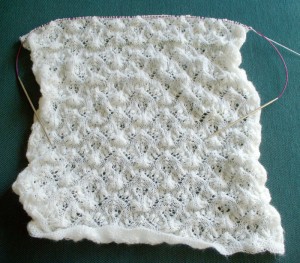
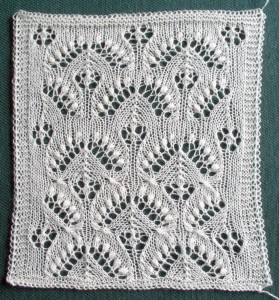
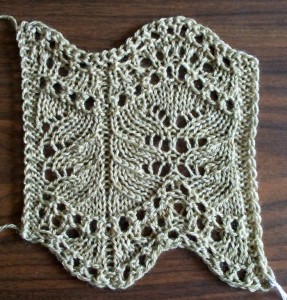
For the shawl at hand, though, my current obsession with Estonian lace demands a main pattern with nupps, the quintessential hallmark of Estonian lace: spots where you work 5, 7, or 9 stitches into a single stitch, then knit all of ’em together on the next row. Some knitters can’t stand working nupps, finding the “knit 5 (or more) stitches together” business too fiddly for words. Me, I was pleasantly surprised when I swatched the Silvia pattern:
I liked working the nupps, no doubt thanks to needles with long tapers, yarn with a good deal of “sproing,” and a seriously loose tension on each group of nupp stitches. In contrast, I did not like working Silvia’s gathers. You’re supposed to form them by working [k5tog, yo, k5tog, yo, k5tog] into the same 5 stitches. Blech! Not fun, even with needles and yarn that permitted fairly easy nupps. Look closely at the swatch: you’ll see I omitted the gathers in its top half.
I made other small tweaks from one repeat to the next too: more or fewer plain rows between repeats, direction of decreases, that sort of thing. What can I say? I like tweaking stitch patterns.
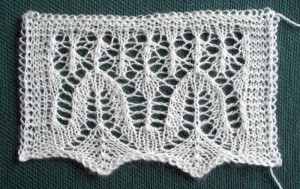
Next up: a couple edging patterns – again, slight variations on traditional Estonian patterns. Here’s the first:
I thought maybe I could start a shawl with this edging, continue with a Silvia variation, put those stitches on hold while knitting a matching edging for the other end of the shawl, then graft the second edging to the held stitches. This would be an end-run around the traditional Estonian technique of knitting the body of a shawl first, then knitting its edging separately, and sewing it all together. Who wants seams in their shawl, right?
But, holding the edging swatch up to the Silvia swatch, I could see they didn’t seem to “go together.”
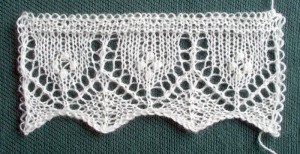
On to edging swatch #2:
This one has nupps, and in character I think it matches the Silvia-inspired pattern better:
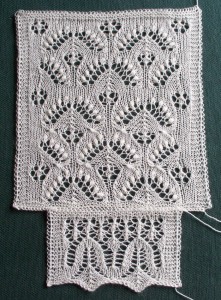
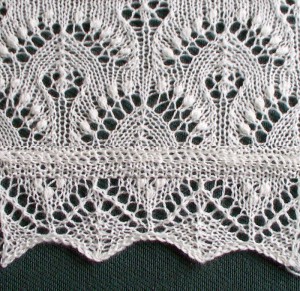
Even better: a little Photoshop trickery places my favorite Silvia variation (which The Haapsalu Shawl book would probably refer to as a “Lily of the Valley and Flower” pattern) next to a reduced version of the edging:
Bingo! I like this combo.
Now I just have to decide whether I’m going to go with the no-sew approach – which would put edging at the top and bottom ends of the shawl only – or with the traditional approach – which would put edging on all four sides of the shawl. Normally, I’m not a slave to tradition… but both books I’ve read describe clearly what to do. And they show fab results.
What would you do?
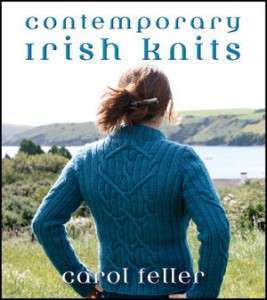
Have your heard? Carol Feller puts a new spin on traditional Irish knits in Contemporary Irish Knits, a collection of fresh and exceptionally wearable designs.
My favorites are Tralee and Knockmore.
Beyond the designs, the book also includes fascinating portraits of the three remaining mills in Ireland that produce yarn for hand knitters. Actually, discovering that only three remained was what prompted Carol to write the book—who would’ve thought that, with Ireland’s rich knitting history, only three such mills would be left?
As part of a CIK blog tour, I got a chance to ask Carol some questions about the process of putting the book together. (No surprise, eh? I’m a process knitter.) Here goes:
With four boys, how on earth did you find the time to do all your research, designing, and writing?
Fortunately they are all in school now; my youngest started last year. He is finished fairly early (at 1pm) so you have to make every second count. That said, when you’re used to having little or no time by yourself, those mornings seem like an eternity (at least for the first week of the school year!) I try not to do anything but knitting related work in the mornings, designing, writing for the blog, etc. Dishes, cooking, laundry, etc. are done during homework time or at weekends (or not at all).
I actually think that when you have a very tight time frame to work in, that it’s easier to focus. I’m not sure that I’ll end up getting considerably more done even when the school days becomes longer. Without the clock ticking, I can lose hours of work site-hopping online (please tell me that I’m not the only one)!
I also almost never actually knit during the day. Knitting is my evening indulgence, when the younger kids have gone to bed.
When I showed your book to my local knitting buddies, everyone agreed: the garments are as wearable as they are lovely, and—courtesy of your husband—the photography is stunning. What was it like, working with your husband on the photo shoots? Had you worked together like this before?
Joe and I have been collaborating since I started designing – he does the photography and layout for all my self-published work. Previously in the blog tour, I answered a similar question from Shannon Okey, so I thought this time I’d hand the mic to Joe so he could give his perspective!
From Joe:
As Carol said, we’ve been working together on the photos and pattern layout from the beginning, which I’m grateful for in a few ways. First, because my “day job” is very verbal, and the photography provides the opportunity to be visually creative, which I crave. Second, because I am (without bias, of course) a real fan of Carol’s work – I think she has created some truly beautiful designs and I love helping her bring those designs to the public. Finally, and most importantly, the collaboration means we get to spend a lot of time together (free time is in short supply in our household). Around Christmas of last year I remember clearly spending an evening together by the fire narrowing down the 1000-plus book photos into a short-list for the final cut, and reminiscing and laughing. You can’t really call that work.
The photography for the book was more challenging than for the self-published patterns. Part of the reason was a sense of pressure. Most of the self-published work is photographed within miles (or feet) from our house, and if a shoot goes badly or the weather turns ugly or the light isn’t just right you can always shoot again the next day. For the book, it was important for us to capture the landscape in which the various yarns were being created. But Donegal, for example, is an eight-hour drive from us, so we really did have a sense of “we just get one shot at this.” It was also a challenge working with a wider variety of models (even if they were mostly relatives). Carol and I have done so many photos together that we almost don’t need to talk during the shoot (other than an occasional joke if she starts to look too serious). With the models for the book, we all had to learn from each other from scratch.
One lesson I took from the experience is this: bring kids to the photo shoot. True, they distract the photographer (at least they distracted me) but that is more than made up for by the fact that they really put the models at ease. Almost everyone in the book was a first-timer modeling-wise and understandably nervous. The boys were the cure – look through the book, and wherever you see a really warm and genuine smile, chances are there is a kid just out of frame.
My local knitting buddies also commented that they could relate to your models, as they “look like regular people.” Some of the models were your sons. Were the other models your family and friends too? Did they look forward to helping out, or did they need some coaxing?
All the models were friends or family, so definitely ‘regular’ people! Everyone was really happy to be part of it; my younger cousin, modeling the Dalkey set, in particular was very excited to get a chance to model (although I think my dad, modeling Knockmore sweater, was just obliging me!) I was fairly cautious when asking people, and you know pretty quickly if someone is interested or not. It does make it extra special to pick up the book and personally know everyone photographed.
The models in the book were three of my boys, my father, my best friend’s husband, three cousins, my niece and my sister. I’ve had several family members wonder where my mother was, so I’m going to state for the record now – she didn’t want to be photographed!
In reading your book, I was surprised to learn that Irish mills currently blend New Zealand fleeces with Irish fleeces—though it makes sense, if what you want is a soft yet durable yarn. In doing your research, did you discover anything that surprised you?
The big surprise actually came before I started the book. In fact, it was a big factor in deciding to do the book in the first place. What surprised me is that there are only 3 mills currently producing commercial yarn for hand knitters in Ireland! I was simply astonished at this fact. That said, what these mills were doing was exciting, as was the incredible work of Irish hand dyers. I wanted my work, and this book, to contribute to the renaissance I see looming in the Irish knitting industry. I’ll leave the reinvention of Irish yarn to millers and dyers; my goal was to change the way knitters think about “Irish” patterns.
What was the most fun part of putting the book together?
I loved the beginning, the planning stage. That’s when you get to swatch ideas, draw sketches and put together a plan of what the book will look like. All the possibilities are still open and you want to see how everything will best fit together cohesively.
I also always enjoy the designing and knitting as well (probably goes without saying!), especially the excitement of seeing your mental image materialize into reality. It’s always magic. It doesn’t seem to matter how many designs I plan, it always gives me the same thrill.
What’s next? Do you have another book in the works?
I’m working on a smaller 7 pattern booklet for the yarn company Fyberspates that should be done in the next few months. After that I don’t have any longer term plans yet. I wanted to give plenty of time to promote CIK, and I knew if I began another bigger project too soon I wouldn’t be able to do the book justice.
As much as possible, I try not to whine on this blog. And when I wrote last week about having to rip back a sock, I didn’t think I was whining. After all, I didn’t mind ripping, and I did look forward to getting the leg the right length. Really, I was laughing at myself. What idiot knits a sock leg too long because she’s too enamored of the stitch pattern to stop and measure the darn thing?
So I was kind of tickled by all the suggestions I received for avoiding the same fate in the future. By far, my favorite was the idea of tattooing a ruler onto my forearm so I’d always have an easy way to measure my knitting. It’s tempting… but no. 🙂
Ripping back and reknitting the cuff—now that’s something I’ve done before, on sweaters if not socks. It wouldn’t have worked in this case, though. The patterning on the cuff flows into the leg, and it just wouldn’t work to reknit the cuff in the other direction. Ditto reknitting the cuff from top down, and grafting it onto a shorter leg; the patterning wouldn’t have matched up right. (Sorry, no photos; it’s a stealth project. So you’ll just have to take my word for it.)
But here’s the suggestion that I can’t get out of my head: knit socks from the toe up.
Sure, I can do that. I’ve designed a few toe-up socks. I know how to knit a variety of heels for toe-up socks. So why not knit more toe-up socks?
Most of the time, I knit socks from the cuff down because I really like plain vanilla flap-and-gusset heels. I can bang ’em out with my eyes closed, and know they’ll fit.
To get that same fit from the toe up, I’d have to knit a “gusset-and-flap” heel. You know, where you work the gusset increases first, then work a heel turn, then work decreases at the end of each row of the “flap” (which doesn’t actually flap, but it’s still called a flap anyway).
I’m never quite sure, though, where to begin the gusset increases. Most toe-up sock patterns with gusset-and-flap heels say something like, “Work even until foot measures x" less than desired length,” but as far as I can tell, x is just pulled out of thin air. In New Pathways for Sock Knitters, Cat Bordhi explains how to calculate foot length to start of gussets from stitch count and row gauge, but it’s all a little fussy for my tastes.
What I’d like is a nice, simple, trustworthy rule of thumb, like the ones cuff-down sock knitters have for determining heel flap length. Rules like “Knit the flap until it’s as tall as it is wide,” or “until it reaches from ankle bone to floor.” That sort of thing.
Suggestions, anyone?
Until further notice, I’m going to toy around with this rule of thumb: “Work even until foot extends to 1" before footpit.” (The oh-so-useful term “footpit,” by the way, is courtesy of Wendy Johnson. I think I found it first in her book Socks from the Toe Up. Basically, it’s the point where your foot meets your ankle, when you bend your foot up.) That seems to be the point where my gusset decreases end for cuff-down socks. It would seem to be a reasonable place to start the gussets for toe-up socks, no?
Good news: I’m really digging a sock design I came up with just before Stitches Midwest. Any spare moment I had outside of class, I worked a few more rounds.
Bad news: I went overboard on the leg. It’s a good inch longer than I usually make ’em. I don’t even have a good excuse. Sure, I finished the leg and started the heel while flying to Stitches Midwest, and didn’t have a tape measure handy at the time. But I could’ve used my usual trick of comparing my knitting against my four-squares-to-the-inch graph paper, which I always have with me.
Good news: I am, apparently, an optimist. A rather determined one. I kept plugging away at the first sock.
Bad news: The first sock weighs 5g more than the remaining ball of yarn. So it looks like I’m ripping back the toe, foot, heel, and one inch of the leg.
Good news: I get to shorten the leg. And enjoy the yarn again. That’s two good things, right?
The swatch therapy continues. The Merino Silk Lace from indigodragonfly blocked out beautifully:
What you can’t really see in the photo is how the yarn glows. Or the wonderful way it feels—too decadent! Arguably, though, I should’ve used smaller needles, maybe 3 mm. At 3.5 mm, the fabric is a wee bit too airy. I guess I was just too psyched to try out my Signature Stilettos.
And in Agleam from Sincere Sheep, we have pattern #143 from Knitting Patterns Book 250:
I love this yarn’s stitch definition—due, I suspect, to its very round, 3-ply construction. The blend of superwash merino and tencel doesn’t hurt either. (Can you tell? I’m a sucker for wool blended with silk, tencel, or bamboo.) I could totally see using this yarn for a lightweight sweater, couldn’t you?
Thanks
By JC | August 11, 2011
I’ve had two weeks to think about it, and I’m just as certain as ever of two things: Sock Summit 2011 was a smashing success, and I was an utter idiot for agreeing to teach during every class session.
Don’t get me wrong; the classes were great fun. I’m honored I had the chance to teach so many skilled and enthusiastic students. Some were even so charming as to bring gifts of cookies, chocolates, and gorgeous beaded stitch markers for their teachers—all part of the Sock Summit magic, I tell you.
But I missed out on so much! I didn’t get to audit any classes or listen to any lectures. I didn’t get to watch the Fastest Sock Knitter competition. I didn’t get to meet Heel Flap, Gusset, and Instep. And I completely missed the Flash Mob! (That’s a story for some other time.)
And then there was the Marketplace.
Mind you, I don’t need more yarn. But it would’ve been nice to have more time to shop for yarn, you know? Most of the time, I was too busy before class or too zoned after class to really get into the Marketplace. All told, I stopped ever so briefly in only a handful of booths.
This story would be irredeemably sad except for one thing: the Sock Summit organizers, sponsors, and vendors put together amazingly generous “swag bags” for the teachers. Sample skeinlets of yarn, and in some cases entire skeins. Notions and needles. Creams and balms.
So I’m recovering with a little swatch therapy. Currently on new Signature Stiletto needles (which are every bit as awesome as everyone says): some luminous Merino Silk Lace from indigodragonfly.
Next up: some Primo from the Plucky Knitter. Or perhaps Agleam from Sincere Sheep.
sigh. Thanks, everyone. It’s helping.
Guess what finally made it to the other side of the pond—Charts Made Simple, that’s what! It’s now available at Amazon.co.uk and, with distribution help from Search Press, yarn shops throughout the UK. Whee! It’s taken months, but I’m thrilled it’s finally taken place.


