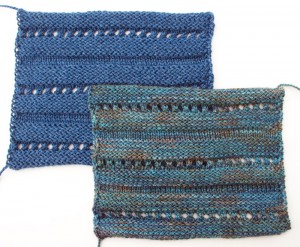
Blocking my Swirl swatches revealed something odd.
Going Green calls for 24 stitches per 4" using 3.75 mm needles. With the Mirasol Nuna swatch, using 3.75 mm needles gave me 22 stitches per 4". Going down to 3.5 mm needles for the String Theory Selku swatch got me a little closer: 23 stitches per 4". So it seems I need to try again with 3.25 mm needles.
What gives? If anything, my gauge is usually a little on the tight side, making it necessary to go up a needle size or two, not down. Then again, a quick search on Ravelry reveals that several other people needed to go down to 3.5 mm needles or smaller… okay, so maybe it’s not just me.
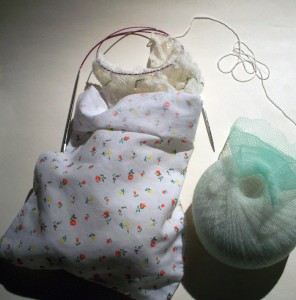
A few days ago, the shawl reached the point where it needs to be contained – not so much to keep floppiness in check, as with some other projects I’ve done, but to keep the bottom edge of the shawl from getting ratty. Simply keeping the lower portion of the shawl contained is protecting it from abrasion nicely:
This particular containment bag is a former 5-pound flour bag. Yup, a flour bag – as of this year, local farmers have started selling freshly milled flour at our farmers market in simple cloth bags. I’m starting to collect a small pile of them. I had been thinking I’d turn them into small project bags by sewing a hem at the top and adding a drawstring, but I’m not sure that would be the best way to make use of them: yarn kind of wants to stick to the lightweight cotton cloth, which is fine for a lace shawl that needs to be contained but not so fine for, say, a sock project that you’d want to get in and out of its project bag easily. Anybody got any other ideas for making use of leftover flour bags?
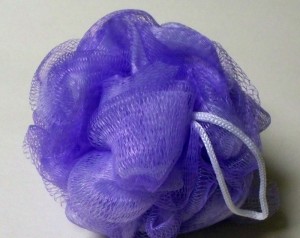
The yarn, by the way, is also contained, and has been since the moment it was wound into a ball. Despite appearances, though, this particular yarn bra isn’t a former produce bag. It never held garlic or anything like that. Rather, it’s a much finer mesh, from a different section of the supermarket: the personal care aisle. You know those shower scrubbies you can buy, the wads of mesh tied with a cord?
Snip that cord, and the wad will unravel into yards and yards of mesh tube. Cut the tube into eight parts, tie the bottom of each closed with a bit of waste yarn, and you have awesome yarn bras: big enough to stretch around jumbo-sized balls of yarn and sproingy enough to hold on tight… all for $1.50. Sweet, eh?
sigh
By JC | November 11, 2011
The Estonian shawl remains at the top of my knitting basket, but I’m still finding bits of time here and there to swatch for my next Swirl. So far, the swatching has been fun mindless knitting, a nice counterpoint to paying close attention to the Estonian lace.
Here’s the rub: it seems I’m not quite hitting gauge. Going Green calls for 6 stitches per inch, and prior to blocking I’m getting about 5.5 stitches per inch. sigh. More swatching with smaller needles is in order.
I’ve said it before and I’ll say it again: the nicest thing about designing for yourself is you don’t need to match anyone else’s gauge.
Overdue
By JC | November 10, 2011
Today I finally got around to something that I arguably should’ve done weeks ago: estimating to what length I can knit my Estonian shawl, given the amount of yarn that I have.
Really, I should’ve made my estimates after completing my swatches but before casting on for the shawl itself. I should’ve weighed and measured the swatches, figured out how much fabric I could squeeze out of each gram of yarn, and from that figured out how much shawl I could squeeze out of one skein.
Bah. I was too excited to get started. Similar shawls used about as much yarn as I had, right? So I just figured out how many stitches to cast on for a reasonable width – 5 repeats of the main pattern plus a couple inches of edging on each side ought to add up to about 21" wide – and had at it.
With 8 vertical repeats of the main pattern done, though, it was high time to decide how much further to go before setting the body of the shawl aside and starting the edging. With scale and calculator in hand, I made a few assumptions, and…
…depending on how I conservatively I fudge the numbers, the answer wavers between 15 and 16 vertical repeats of the main pattern. That ought to add up to a shawl between 49" and 52" long. And that means I’m at least halfway through the body of the shawl – whoo hoo!
So now the question is: do I trust my estimates? Of course not. I’d like to make the shawl as long as possible without running short on yarn while knitting the edging. So I’ll knit until I have, say, 14 repeats done, then make some more estimates. Hopefully, being closer to the finish line will give me more confidence in my estimates, and tell me whether to stop at 15 repeats, or to go on to 16… or, with luck, maybe even 17.
An idea
By JC | November 9, 2011
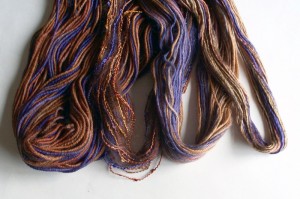
Sheri’s most recent blog post got me thinking. For the past few months, I’ve had a series of Fiesta sampler skeins marinating in my stash:
They’ve been marinating because I’ve been stymied: what do you do with four sampler skeins, all in the same gorgeous colorway but each with its own seductive texture? Swatching them individually didn’t seem right; they belonged together, in some sort of simple but stunning project. Mitered squares, maybe? Entrelac? Nothing really grabbed me.
Until Sheri’s post about Carrie’s Summer Wind scarf/cowl. What if I knit a similar loop that could be worn doubled as a cowl, or folded and tucked through like a scarf? Picture a fabric with welts, like Sandra’s Swirls, with each welt in a different yarn.
Talk about a mash-up: yarn from Fiesta, fabric from Sandra, construction from Carrie, styling from Sheri… but I think I like the idea.
You’ve heard of Patternfish, right? It’s a top-notch source of patterns, nearly 10,000 of them.
Which pattern gets the honor of being the 10,000th? You get to decide! The folks at Patternfish have narrowed the field to 11 contenders, and you get to vote for one of them.
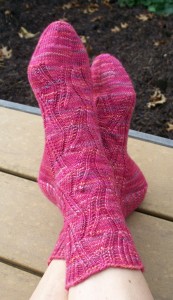
I’m thrilled to say one of my designs is in the running – whoo hoo! Check out Sidewinder:
You can see more photos on Sidewinder’s page at Patternfish.
Designing and knitting these socks was a lot of fun. As so often happens for me, it all started with stitch pattern exploration: I saw an interesting little lace pattern, expanded it, added purl bumps for interest, replaced yo with M1, and turned it into a rib… yeah, doesn’t much look like the original lace pattern anymore, but I do like the socks!
If you like ’em too, you can take a moment to vote for them at Patternfish… or not, as you like. Really, I am just thrilled to be in the running.
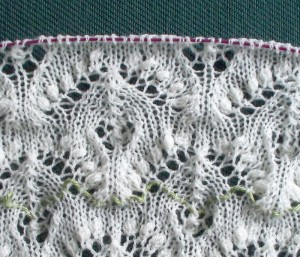
Astute readers of last Tuesday’s post might have noticed a thin green line running through my WIP:
That’s a lifeline, a bit of waste yarn run through every stitch on a single row. If I make a disastrous goof, I can unravel back to that row, slip the stitches from the waste yarn back to my needles, and start over. It’s the knitterly equivalent of hitting the “Save” button every 5 minutes when typing in a long document: if something goes wrong, you’ve only lost at most 5 minutes’ work.
I don’t often use lifelines. Part of it is laziness – who wants to bother installing lifelines? Who wants to interrupt their knitting fun for that kind of tedium? And part of it is hubris – hey, I know how to fix mistakes without ripping back, right? And even if I did need to rip back, I know I could do it, even without a lifeline – I might not like it, but I could do it.
But for this project… well, so far I’ve opted for the added peace of mind that lifelines offer. Each time I complete a 32-row repeat, I check my stitches, then I pull out the old lifeline and re-insert it through all the stitches of the current row. On the next row, I ignore the lifeline as best as possible.
Why? A bit of nupp paranoia, I think. Don’t get me wrong: as I said before, unlike some knitters I don’t mind working nupps. But early on in this project, on a couple nupps I missed a loop or two when working p5tog. It wasn’t until a row or two later that I noticed the loose loop of yarn dangling in the breeze. Given the way nupps are constructed, nothing would’ve unraveled – it wasn’t like I’d dropped a stitch – but that excess yarn would’ve eventually wiggled its way around, creating an unattractive looseness in the nupp and its surrounding stitches. So I dropped back the offending stitches and reknit them – a somewhat fiddly affair, as you can imagine.
Hence the lifeline. With more nupping practice under my belt, and close attention to my p5togs, I haven’t had any dangling loops for a while… but I’m not taking my chances. If I discover a malformed nupp several rows down, I want the option of ripping back to a lifeline. It all boils down to choosing your poison: the tedium of installing lifelines, or the fiddliness of repairing nupps?
Well, it seems Joan and I won’t be attending the Beyond Toes trunk show at Twisted today. Joan picked up a cold at Interweave Knitting Lab and is staying home to avoid giving it to anyone else, and I’m too lazy to drive up to Portland by myself. (Carpooling with Joan, we could’ve had fun chatting. Driving by myself? Not so much fun.) Oh, well.
In other news, Lara Neel of Math4Knitters, Crafty Living posted a new podcast interview today. Recorded a few weeks ago, we chatted about UFOs, what drives us to knit, and a bunch of other stuff. Go ahead, listen to it – I’ve already checked; I don’t sound like a blithering idiot.
I just realized I’ve been utterly remiss in not mentioning Beyond Toes, Judy Becker’s new book. (Sorry, Judy!)
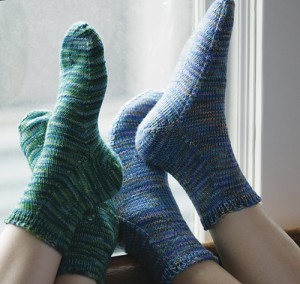
As the subtitle says, it’s a series of Knitting Adventures with Judy’s Magic Cast-on. Tied in many knitters’ minds with toe-up socks, I’ve long known the JMCO was magic because it could be used in many other ways as well – for example, as a provisional cast-on, as a start to a tubular rib, or as a start for double knitting. I’ve even seen Cat Bordhi use it to start a hem. Beyond Toes has patterns that make use of the JMCO in all these ways, plus a few new eye-openers.
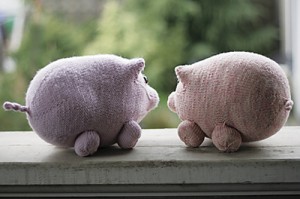
Deb Barnhill uses it to start a bit of twisted I-cord – here, for piggy tails:
Jeny Staiman suggests using it to add more stitches to an existing piece, then knitting the stitches in both directions – say, to start socks at the heel then add stitches for the instep and the front of the leg:
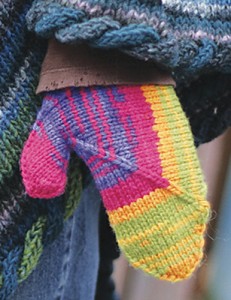
Lorilee Beltman found a wacked-out way of using it to start mittens:
Cool stuff, eh? If you’re lucky enough to live near Portland, OR, check out the Beyond Toes trunk show that Twisted is hosting this week. As a bonus, Judy will be there tomorrow, Sunday the 6th, for a book signing from 2 to 4pm. Joan Schrouder and I are going – how about you?
Have you listened to the latest Knitcircus podcast? I have; I was the one nodding my head vigorously as Amy blasted open the myth that you can give a long-tail cast-on more “give” by working it over a larger needle, or over two needles held together.
Oh, not so, dear reader.
Lemme show you why. (Amy explains it perfectly well, but hey, I’m all about the pretty pictures.)
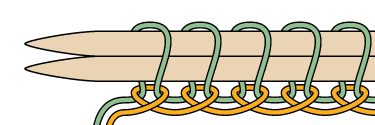
Consider a long-tail cast-on being worked in two colors: green for the yarn attached to the ball, and orange for the “tail” yarn (to match my favorite jumbotron yarn, of course). The green yarn forms the stitches; the orange secures each cast-on stitch by wrapping around its base.
If you hold two needles together, the green yarn loops around both of ’em:
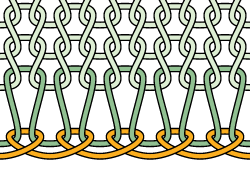
This creates big, messy loops. You can see it even more clearly after knitting a few rows – shown here in light green:
Instead, just cast on over a single needle of the usual size:
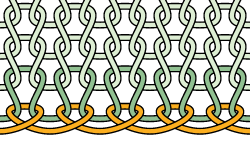
This gives you cast-on stitches that match those in the rest of the fabric:
So doing a long-tail cast-on over a larger needle or over two needles is not the way to go. You can get a looser long-tail cast-on in a few different ways, but Amy describes a nice, simple method in the podcast: just space the stitches out on the needle as you cast on. It’s kind of like when you space stitches out on your right needle as you’re doing stranded colorwork, to keep the fabric from puckering.


