It’s been a couple weeks, but I still have a story to share from my trip to Stitches West.
Stitches was fabulous, as usual. A real highlight was getting to see the projects in Betsy Hershberg’s new book, Betsy Beads. Jeez, now I have a hankerin’ to knit some beaded I-cord…
But the story in question takes place before Stitches itself. Remember how I said the shawlette would make for better airplane knitting than the Swirl? Well, after boarding my flight to San Jose, I pulled out the shawlette and settled in for a pleasant hour-and-something of knitting. And then I discovered The Goof.
Right as the plane was pulling back from the gate, I noticed a yarn over where it didn’t belong. It was near the start of the shawlette, before I’d properly memorized the stitch pattern. I had put a yarn over where one didn’t belong… but I’d also put in its matching decrease, so the stitch count wasn’t off and I didn’t catch The Goof when working the following row.
What to do? Several options ran through my head:
- Ignore that pesky misplaced yarn over and get on with my life – no-one would ever notice it. Yeah, but I would know it was there.
- Rip out and start from scratch. The shawlette was still pretty small at that point; I would only lose a few hours’ work. But I didn’t have any waste yarn on hand to re-start with a provisional cast-on. So I wouldn’t get to knit on the plane – bummer! And unless it’s absolutely necessary, I can’t stand the idea of starting over from scratch.
- Rip past the misplaced yarn over, and re-start from there. I would lose at least three-quarters of what I’d already knit. And without a lifeline in place (or the tapestry needle and waste yarn needed to install one after the fact), it might be a little fiddly. Still, it was a viable option. But there was one more option to consider…
- Drop back and re-knit. Hmm. Could this work? The stitch pattern has a repeat of 12 stitches, but one of every six stitches is always a plain knit. That is, all the lace patterning takes place within groups of just five stitches. So I would only need to drop back the five stitches of the group with the misplaced yarn over. The catch? I’d have to drop them back a good 24 rows. And re-knit them with just the needles on hand, without any help from spare dpns or even a crochet hook.
In the end, I went with option #4. I figured that if the dropped stitches created an intolerable, unruly mess, I could always fall back to option #3, or even option #2.
And guess what? It wasn’t that bad! Yes, the dropped stitches created an unruly mess of loose strands, but dealing with them – carefully re-knitting those five stitches, one strand at a time – was tolerable. And it didn’t take nearly as long as I thought it might: I finished before the flight attendants managed to get the drinks cart to my row, leaving plenty of time to make forward progress on the shawlette.
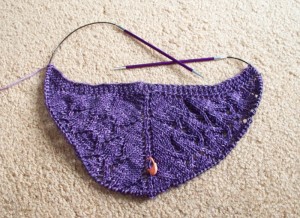
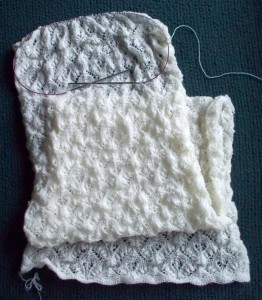
And since then, I have made decent forward progress:
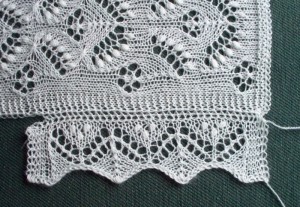
Soon I’ll need to figure out what edging I want. If I’m smart, I’ll put in a lifeline first, so I can easily try a couple options.
In a couple hours I’m off for a fun-filled weekend at Stitches West. But first, I wanted to update y’all on my projects.
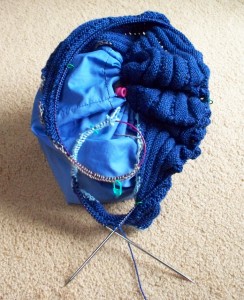
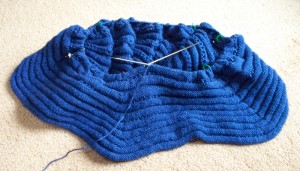
The Swirl has really grown:
Kind of funky looking, huh? Over the weekend, I bound off across the back neck and along the edges of the lapels, and started increasing for the sleeves. This resulted in a floppy, unruly pile of knitting. Now a drawstring bag holds the “body” of the Swirl – the circle forming the collar, lapels, sides, and lower back — while the nascent sleeves poke out the top. Much easier to deal with!
Look close and you’ll see tan and light blue bits of waste yarn. Those are provisionally cast-on stitches that I’m gradually incorporating into the knitting to shape the “bottom” of the sleeves. Later, to shape the “top” of the sleeves, I’ll put stitches on hold instead of binding off. Since I’m essentially short-rowing across both sleeve edges, grafting the edges together might prove a little fiddly… I’ll let you know how it goes.
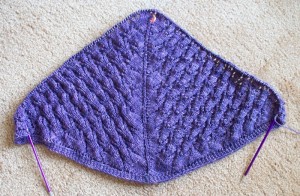
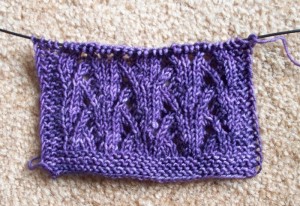
Also over the weekend, I started a simple triangular shawlette:
As I was contemplating my options and getting ready to cast on, I suddenly realized I’ve never knit a simple, two-wedge, top-down triangular shawlette. Big rectangular and circular shawls with fancy edging, yes. Top-down shawls with Faroese shaping or with multiple wedges, yes. But a simple shawlette? Nope, never, despite their popularity.
So that was it. I had to start a simple shawlette. And I’m glad to have it. Given its petite size, it’ll make much better airplane knitting than the Swirl. Still, I’m taking both projects to Stitches West. You never know which project you might want to work on at a given time, right?
On a rock
By JC | February 16, 2012
You might think from my lack of recent posts that I’ve been hiding under a rock, but the truth is I’ve been on a rock: San Juan island, site of Cat Bordhi’s Visionary retreats. It’s where Charts Made Simple was incubated, along with knit, Swirl! and Beyond Toes and so many other books. Oh, the books that are going to be unleashed in the near future! Too bad I can’t tell you about them. 😉
But I can show you the progress I’ve made on my Swirl:
I’m nearly ready to bind off along the lapels and back neck. And I will actually bind off: it’ll give the Swirl some “structure” from which to hang. But later, when it comes to shaping the sleeves, I plan to deviate from the pattern as written. Rather than cast on, bind off, and sew a sleeve seam, I want to cast on provisionally and graft. That’ll create more fluid fabric along the underside of the sleeves. Besides, it’ll be fun, right?
I’ve also been swatching some yummy Plucky Feet:
It’s not blocked yet, but already it’s whispering “triangular shawl” to me. What do you think?
Blocking makes such a huge difference, doesn’t it?
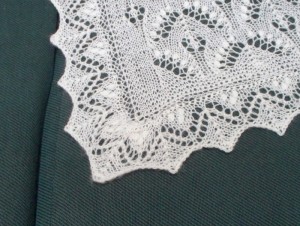
It wasn’t my most patient or meticulous blocking job, but I think it turned out okay. Even the corners look decent:
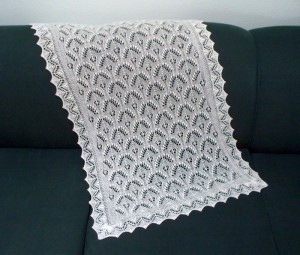
Jane, as always, is ready to model:
Vital stats: approximately 21 x 60″ (53.5 x 152.5 cm), with just 4.2g of yarn left over.
Would I knit another Estonian shawl? Sure, but I’m in no rush. I liked trying out the traditional construction method, I had fun with the nupps, and I’d love to play with other Estonian lace patterns. But another months-long project, similar to this one? Nah, not right now, thanks; I have other things I’d like to explore first.
Last Friday I finally finished binding off the second edging piece for my Estonian shawl – despite the aggravation of having three stitches get away from me and start to unravel. As luck would have it, two of ’em were nupps. When those puppies unraveled, the edging started to dissolve into a mess of long, loose, unruly strands. Less experienced lace knitters would have cried. I swore, grabbed clip-on markers and crochet hooks and other emergency repair tools, and got to work. Properly reconstructing those stitches took nearly 40 minutes… but at least I didn’t have to tink back three rows on an edging with hundreds of stitches! No pictures, sorry; my focus was on repairing the mess, not recording it.
Binding off that piece on Friday let me spend a good chunk of my weekend sewing the shawl together. The idea is that each edging piece is sewn along one short end and one long edge of the shawl, then the two pieces are sewn together at opposite corners. The trick is easing the edging around the corners, and along the long edges of the shawl (where the row gauge of the shawl differs from the stitch gauge of the edging).
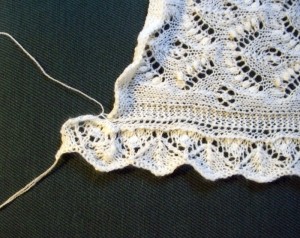
Luckily, getting an edging point to match up with the first corner only required a little bit of fudging:
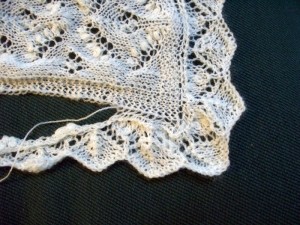
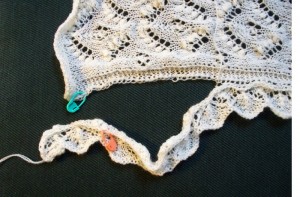
But would the edging be the right length? It didn’t seem so, because the skinny bit of edging easily stretched far longer than the shawl. Even when the first edging piece was nearly sewn on, it still looked too long:
Ah, but wait: see the clip-on markers? The green marker is 6 stitches from the end of the shawl; the orange marker is 15 stitches from the end of the edging. Matching those bits up – 2 edging stitches to 1 shawl stitch three times, and 3 edging stitches to 1 shawl stitch three times – eases the edging halfway around the corner. And prior to the markers, the edging is eased on at a rate of 4 edging stitches to every 3 shawl stitches.
In the end… yes! It fit, with just a stitch or two of fudging:
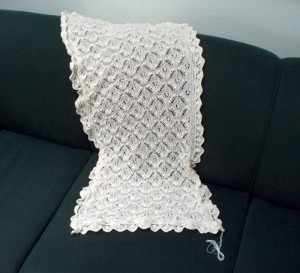
Hours later, with all the edging sewn on, I’m quite pleased with the results. Even without being blocked or having its ends woven in, the shawl looks far more finished, far prettier than with just a plain garter-stitch border:
Now to find the time to block it… whoo hoo! I can’t wait.
Road trip
By JC | January 23, 2012
Next May, I get to road trip to Seattle. The knitting guild there has asked me to be the featured speaker for their monthly guild meeting. Whee! Ought to be fun… just as soon as I figure out exactly what I’ll talk about. Charts in some form or another, I suppose. Maybe “Chart Symbols: Not Just Arbitrary Squiggles Anymore.” Or “Stitch Dictionary Obsession and Why It’s Okay.”
(Oops. I just noticed that Mary Scott Huff and Franklin Habit were speakers at Seattle Knitters Guild meetings last year. Now I’m intimidated. Talk about tough acts to follow! Okay, where’d I leave my big-girl panties?)
After the guild meeting, I’ll stick around the Seattle area long enough to teach at a couple superb shops. On May 5, it’s Slick Set-in Sleeves and Charts Made Simple at Acorn Street Shop. And on May 6, it’s Cast-on Cornucopia at A Good Yarn Shop. (Yup, that shop, Debbie Macomber’s dream shop.) Some of my favorite classes!
I’ll let you know when the shops open up registration for the classes. And in the meantime, you let me know if there’s a topic you’d like me to rattle on about, okay?
This weekend I totally surprised myself by finishing the first edging piece for my Estonian shawl. Granted, it was a long weekend, and the weather was miserable, so I had plenty of knitting time. But with so many stitches on the needles, you’d think I’d be tempted to work on other, less tedious projects… you know, ones where an hour’s effort produced visible results.
Nope. Quite the opposite: I was the lucky beneficiary of the “just one more row” instinct. One row turned into two, two rows turned into three… I couldn’t help myself; I just had to keep knitting.
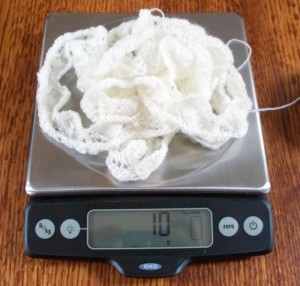
And in just a few days I had a ridiculously long and skinny bit of fluff. Piled on the kitchen scale, it looks like this:
Better yet, here’s the remaining yarn:
Whew! That’s reassuring. Now I know I’ll have enough yarn to finish, without having to rip any of my swatches.
Here’s what I have yet to figure out: will it work? Will I be able to sew the edging pieces onto the body of the shawl, easing around the corners and matching the edging points to the corners, without going blind or crazy in the process? Will it block out nicely, or will some part insist on puckering or curling? Will the shawl be of reasonable size, or will it seem like an oversized scarf?
The only way to find out is to keep on going, starting with the second edging piece. With any luck, the “just one more row” drive will seize me again.
I don’t suppose it’s any surprise I’ve been dragging my heels on my Estonian shawl project. I mean, really, who looks forward to casting on 565 stitches?
Fortunately, the traditional cast-on is a knitted cast-on. It’s a fast cast-on, especially if you transfer new stitches from the right needle to the left as I (and, according to the books I’ve read, the Estonians) do: by pointing both needles upward as you insert the left needle into the new stitch. Keep the right needle in the stitch, and you’re already in position to create the next stitch. This means you don’t have to fumble around, reinserting the right needle… way cool when you’re casting on a gazillion stitches.
You’ll notice I cast on with two strands held together. That’s another bit of Estonian tradition: it makes the edges of their shawls a tad sturdier. I used the the outside and the inside ends of my one ball of Grignasco Prezioso. It’s not my favorite way of playing with two strands at once – sometimes, keeping the two ends of the same ball from getting tangled can be a little fiddly – but it was the only sane choice in this situation; no other option would guarantee that neither strand would run short.
Next up: knitting two plain rows before starting the lace pattern. That’ll also be a sanity saver. The idea of jumping right from the cast-on into the lace pattern gives me the heebie-jeebies. Knitting a couple rows will give me a base of regular-tension stitches into which to work the lace – so much better than trying to work double decreases into the cast-on stitches.
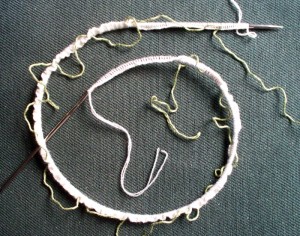
Knitting a couple plain rows will also give me a chance to readjust my markers. The photo shows how I used a bit of waste yarn to mark off every group of 50 stitches. Smart move: eleven groups, counted at least twice each, plus another 15 stitches, lets me know I have the target total of 565. What would’ve been a smarter move, though, would’ve been to place markers every 48 or 60 stitches – that is, every 4 or 5 repeats of my 12-stitch pattern, where they’d help me establish the lace pattern correctly. Oh, well. I’ll move the markers after the two plain rows.
So: using a fast cast-on, using two ends of the same ball, working plain rows before starting the lace, and using markers to keep tabs on the cast-on count and on the pattern repeats. That’s a slew of sanity savers. I think I’ll need ’em all… after all, this is just the first edging piece. Once it’s done, I get to do it all over again.
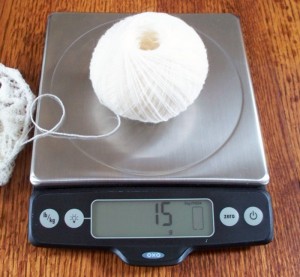
Remember that Estonian shawl I’ve been working on for months? Back in November, I estimated that I could knit 15 or 16 vertical repeats of the main pattern before I had to start on the edging. Well, I’m just shy of 15 repeats. And updated estimates – achieved with scale, calculator, and conservative guesswork – reveal it’s high time to get going on the edging.
The question is, do I want to go the traditional route, knitting the edging in two pieces from the outside in before sewing it all together? Or do I want to go the modern route, picking up stitches and knitting the edging from the inside out?
Normally, I’m not a slave to tradition. (Somebody refresh my memory: Who said, “We do not honor tradition by slavishly repeating it”? Anna Zilboorg, I think.) Normally, I’m all in favor of seamless methods.
But this time I’m thinking of going the traditional route, just for the sake of trying it out. I don’t think the sewing up will be that onerous. Actually, I tried it out this afternoon, on a couple swatches. (Hooray for swatches!) Weave a tail through a selvedge loop on the swatch of the main pattern, then weave it through a bind-off loop on the edging swatch, repeat, repeat, repeat, and voilà! You get a lacy and reasonably attractive join.
Alright, so it seems I’ve decided on the traditional route. Now it’s just a matter of gathering the strength to cast on and establish pattern over roughly 500 stitches… twice; once for each section of edging. Wish me luck!
Sucker
By JC | December 29, 2011
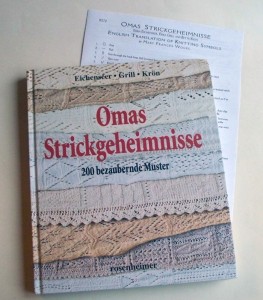
I’m a sucker for stitch dictionaries. That’s why I had to get this:
Omas has been on my wish list for a long time. It’s in German, and I don’t read German – shoot, I can’t even pronounce the book’s title – but, as you can see above, Lacis distributes the book with an English translation of its key.
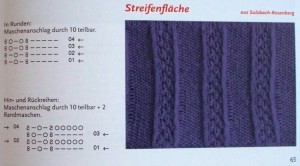
Good thing, too. IMHO, some of the symbols are downright weird – like, who thought of “O” for “knit”? If it were up to me, “O” would stand for “yarn over,” as it looks like the eyelet created by a yarn over. Sure, sure, the symbols in Omas are probably common in Germany – they seem to be the same as the ones in Maria Erlbacher’s books – and would be familiar to German knitters. But they strike me as weird.
Stranger still: most of the patterns are presented with two charts, one for knitting in the round and another for knitting flat:
For the wrong-side rows of the flat-knitting charts, the symbols match the stitches as worked, not as viewed on the right side of the fabric. Very few books published in the US do this (I can think of only one, and it shall remain nameless). Why is this strange? Because it messes up the visual correspondence between chart and knitted fabric. Expanses of reverse stockinette, for example, translate into something that looks like garter stitch in a chart. Not cool.
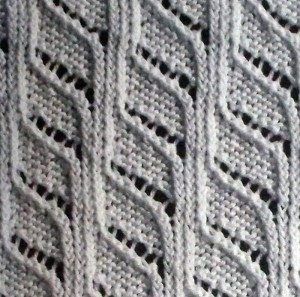
Fortunately, if a pattern is presented with just one chart, it’s an in-the-round chart. If I squint and tilt my head and try real hard, I can get past the weird symbols and see the resemblance between these in-the-round charts and the swatch photos. Still, when I want to use one of these charts, I figure I’ll redraw it first using my preferred symbols. It’ll be time well spent. I’ll become familiar with the pattern, and I’ll lessen the likelihood of goofing up as I knit. And, you know, I’ll avoid all that squinting.
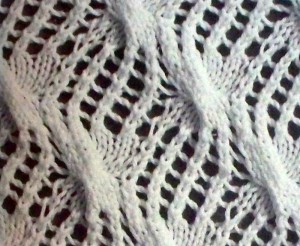
And someday I am likely to use some of these stitch patterns, or at least elements of them. Wouldn’t a variation on this theme make for great socks?
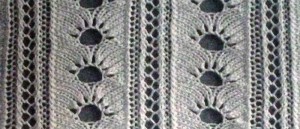
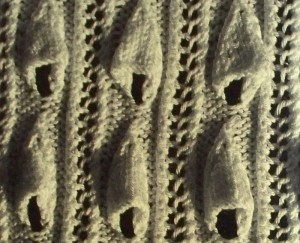
Lots of patterns make use of multiple adjacent yarn overs to create dramatic lace, or to create three-dimensional “poufs”:
What could you see using this for?


